Showing posts with label storage compartment. Show all posts

Sunday, 22 September 2013


Exhaust manifold (part 2)


After having replaced the right side exhaust manifold with a used one, Dad also had to work on the left side manifold. The gasket had a slight leak, and the manifold had a corner broken off. The manifold was not replaced, but Dad took it off and reinstalled it with a new gasket.


As with the right manifold, it was no easy task. One of the studs had stripped threads, the nut was completely loose and no way to tighten it. Looks like the previous owner found a "clever" way to "fix" this: drill a hole through the stud and drive a cotter pin in the hole! Of course that didn't make the nut much tighter, so Dad had to properly fix this. Here's this infamous stud, which took a lot of work to get out.


So in the end, both manifolds were taken down, one of them had to be replaced, and both gaskets were replaced as well. No more exhaust leaks and noises, and no more risks of getting stranded due to a completely blown gasket or broken manifold.


Valve seals

Another issue that Dad wanted to fix was the valve seals. These are small rubber seals that prevent engine oil from entering cylinders at the valves. Over time the rubber degrades and dries, and then oil can make its way inside the cylinder under some conditions.


Typically, this happens on a cold engine that hasn't ran for some time, where residual oil from the engine heads will slowly leak past the valves and into the cylinders. When the engines is started, the oil burns and a blueish smoke cloud comes off the exhaust pipe.


Also, if the engine runs at idle for some time, or when descending a steep downgrade with the foot off the gas pedal, high levels of vacuum at the intake manifold caused by the throttle valve being closed attracts oil in the heads around the valve stems. Upon acceleration, the oil gets sucked past the eroding seals and down through the valve guides, where it burns in the exhaust. Pressing the accelerator after a long coast will cause huge clouds of blue-white smoke exit the tailpipe. The burning smoke will disappear during cruising or highway speed.

The older the seals get, the more obvious the problem gets, oil comsumption increases, and those blue smoke clouds just make the vehicle look like an old wreck. Fortunately, this is not a very serious problem, it is not very hard or expansive to fix. However the valves have to be done one by one, wich is somewhat time consuming.

Normally a special tool is needed to compress the valve springs and remove them, but it could not be used due to the lack of space. The floor opening in the engine compartment of the Travco is right at the same level as the valves and prevented the use of the tool.


So Dad decided to make his own spring compression tool. A few hours of work, some adjustments, and the tool was ready. It allowed Dad to easily compress the valve springs and then take them off.

Here's the homemade tool. Just turn the threaded rod!


Dad used compressed air through the spark plug hole to keep the valves in position and prevent them from falling down in the cylinders while he replaced the seals. Seal were done on all 8 cylinders, and gone are the huge smoke clouds after engine starts or at the bottom of hills!


And while being there, Dad cleaned and repainted the valve covers.


Power loss


Another engine issue, this time a more serious one...

On a few occasions last summer, the motorhome experienced significant power losses. The problem seemed to get worst toward the end of the season. The issue would appear typically during a sustained climb. The engine would bog down drastically, loosing all power, and would crawl its way up the hill at a very low speed in 1st gear. Not fun at all !

This started two years ago, but last summer it got so obvious that Dad got worried and couldn't ignore it anymore.


Dad first suspected the fuel pump. He checked it, found nothing wrong with it, but decided to replace it anyway, just in case. But the problem remained. Normal driving, highway driving, was just fine, even when flooring the gas, like when passing. But during long climbs, the engine still lost power.


So Dad tought about the carburator. Maybe the choke wasn't working right, or something like that. Since until now the engine always ran just fine, Dad never actually tought about the carburator. So it could be anything, like some dirt inside the carb, a bad float, or maybe it just needed some cleaning and a readjustment.


Carbs like this are pretty complex. The carb is a Carter ThermoQuad, pretty much the standard carb found on many Dodge/Chrysler V8s of the era. Dad didn't want to touch it himself, so he started looking for a guy who knows these carbs. With today's electronic fuel injected engines, carbs are a thing a the past, and it is not easy to find a guy who knows about these 40-year old carbs. But Dad found his guy, and brought him the motorhome.


He took the carb off for a complete overhaul, and soon realised that sometthing was wrong: a part was missing !


The missing part is called a metering rod. There are 2 such rods in a ThermoQuad. They are some sort of thin needles that basically limit the fuel when the engine is under light load. Under high loads (like going uphill) the engine shouldn't be too affected by this missing part. However, it could make the air-fuel ratio too rich under light load, and affect the fuel mileage. In the end, it looks like the engine had been running without this part for some time (it was certainly missing when Dad bought the motorhome 6 years ago), and there was no clear evidence that this was causing the power loss issues.


Anyhow, Dad managed to find replacement metering rods, and his guy completely cleaned, rebuilt and readjusted the carb. New gaskets were used and the carb was put back in the Travco.


And now the engine runs perfectly. The big 440 starts nicely, idles smoothly, roars instantly at the touch of the gas pedal, and pulls the Travco up any hill for any lenght of time with power to spare !!  


Storage compartment


Meanwhile, Dad added a new storage box on the motorhome. Travco's storage compartments are not very large, and Dad was looking for more space, specifically some place to store his leveling blocks. So he decided to add a new storage box, under the rear left storage compartment.


There wasn't enough clearance for Dad to use standard hinges for the compartment's door, so he had to figure out a different way to make the door open and close and lock. Some "Whale Blue" paint, and the job was done! 


Here's the new storage box, with the door closed and open. Pictures don't show the lock details, but as usual it's a very clever design, typical of Dad !


Trips


The Blue Whale made a few trips this summer. First one was a camping weekend at the Pointe-aux-Oies campground in Momtmagny. Family and friends were on adjacent sites, as shown on the following picture where the Whale is just beside Dad's brother Yvon's 1975 Winnebago.
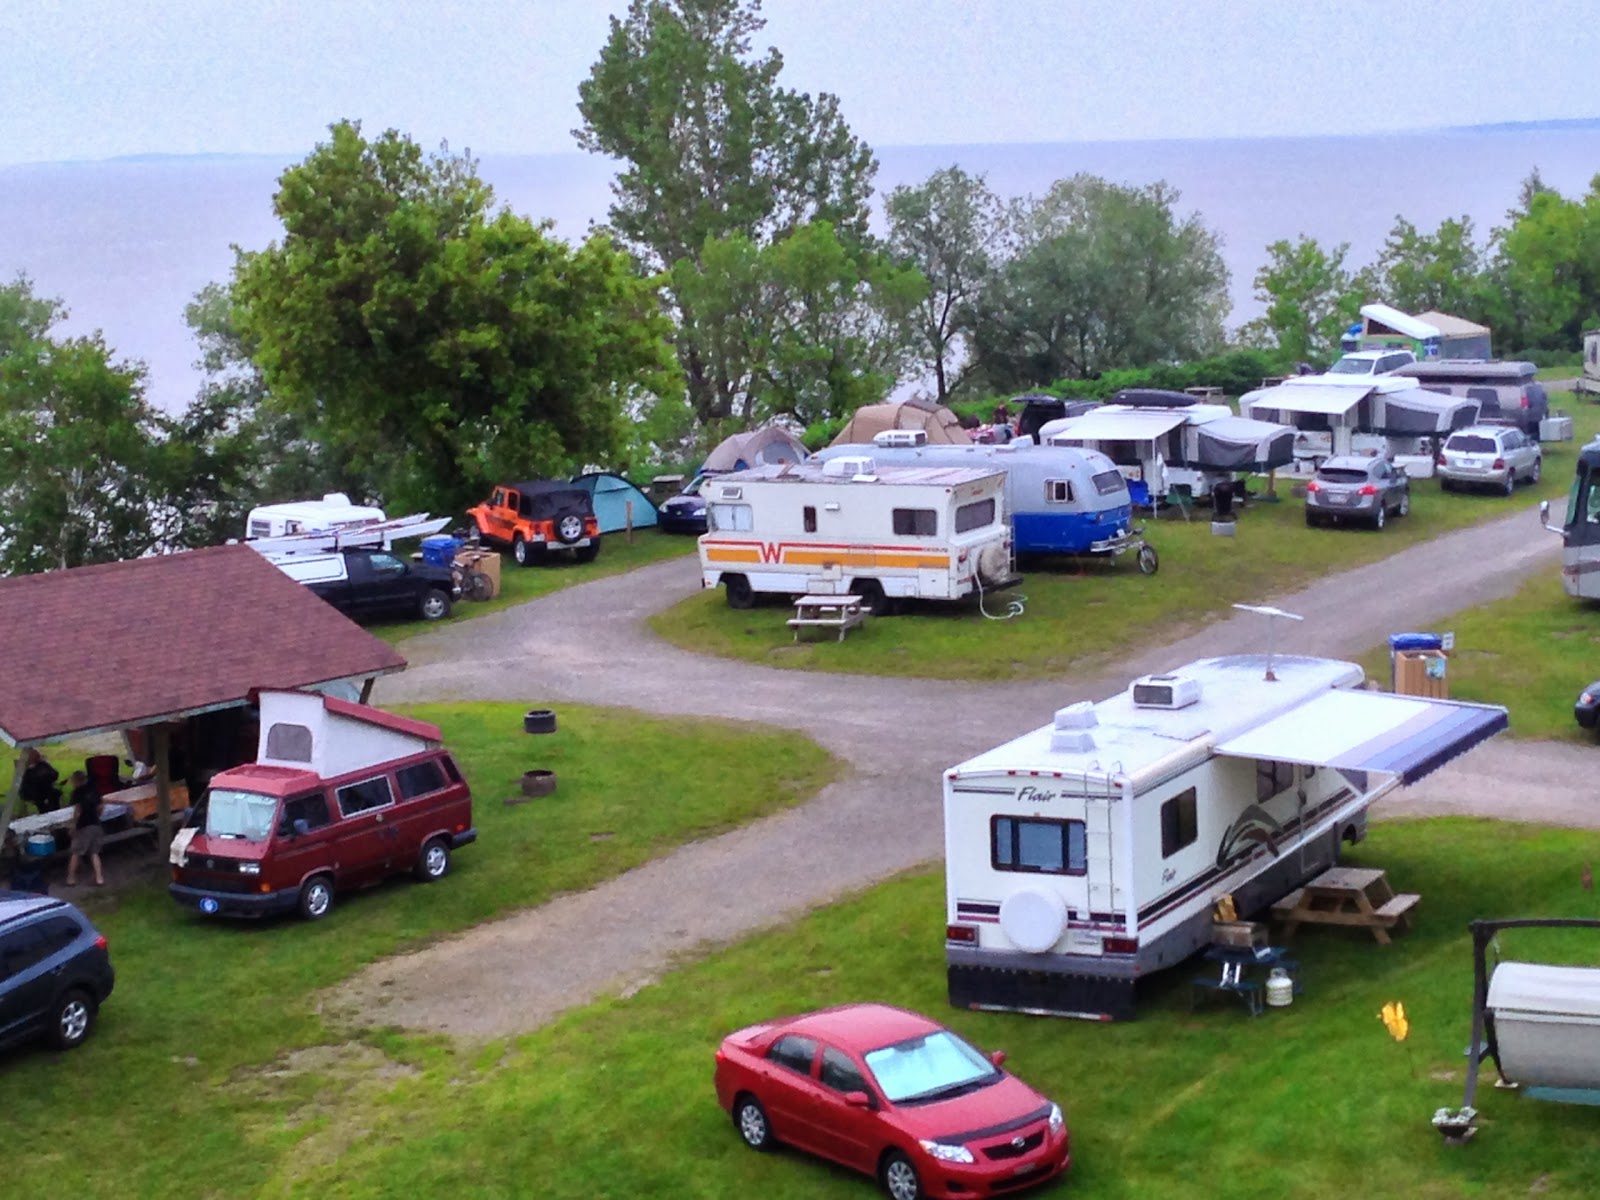


This summer the Blue Whale went up Quebec's north shore, all the way to Sept-Îles, QC, where my parents visisted friends and relatives.

Next was a trip in the Laurentians, north of Montreal, for a few days, then Lac St-Jean and Charlevoix in early September. This year's last trip will probably be during the canadian Thanksgiving weekend (mid-October), in the Beauce region. With this trip, the Blue Whale will have travelled over 3000 km this summer.


Thursday, 18 September 2008

September projects

Furnace air ducts

Hot air from the furnace is ducted throughout the motorhome by two pairs of 4" flexible air hoses (similar to clothes dryer hose). The first pair of hoses run under the couch, in front of wich are two small vents where the air comes out. This couch, wich is permanently attached to the floor, can be transformed into a bed, and is also a useful storage compartment. The other pair of hoses, connected on the othe side of the furnace, run in the lower cabinets of the kitchen and then toward the back of the Travco.

The problem with these hoses is they take a lot of storage space. A significant volume of the couch storage compartment is taken by the hoses. Under the sink, the way the two other hoses are hooked to the furnace limits storage as well. So Dad decided to do something about this.

First Dad replaced the dual hoses under the couch with a single metal duct, that feeds both vents. Dad used old galvanized steel ducts. He had to adapt and modify some parts to connect them to the furnace output. The new metal duct is much stiffer and takes less space than the original flexible hoses. Dad spay-painted the duct, and it looks nice and clean.

This is the old hose adapter that connects to the furnace:


Here's a new adapter Dad made:


Dad painting the duct before installation:


Under the couch before installation:


New duct and adapter in place:


Under the sink, Dad kept the original dual hoses, but made an entirely new adapter that allow him to position the hoses in the back of the cabinet, freeing a lot of storage space.

Old hose adapter inside the cabinet:


New adapter completed:


Same cabinet, new adapter:


Drawer

Dad made this small drawer, enclosed inside the end of the couch, near the entrance door.


The drawer is used for storing gloves, a flashlight, basic tools (pliers, screwdriver, etc.) emergency flares, and other objects that may be needed quickly, as it is quicker to open this drawer than search for stuff in an outside storage compartment. It has sturdy metal slides, and the drawer slides into a wooden divider box that separates the drawer's content from the objects stored under the couch. An old piece of wood, a bit of sanding, some varnish, a locking handle, a stainless steel frame, some patience and lots of time!


Parking spot

Dad kept working on the Whale's parking spot, in his backyard. Since last spring, a entire tree was moved, limbs were cut, the Whale almost got stuck in the mud... now Dad bought about 100 ft of drain tile, wich should improve soil drainage. So there will be a lot of digging and shovelling over the next few days...

Thursday, 31 July 2008

Summertime

Stoneham

Just as expected, getting the Travco ready for its first trip of the year was a race against the clock. There was so many things to fix! Once he had the engine oil changed, Dad started the big block V8 for the first time this year. The engine fired right up, idling smoothly, as if it had been shut down only a couple minutes before.

The big challenge was to get the motorhome out of its winter parking in the backyard wihout getting it stuck in the mud. Dad's good friend Gerry came to help, wich was a good thing because the Whale almost got "beached" behind the familiy house. The soil was completely soaked, thanks to the continuous rain, and after a significant grunt from the powerful 440 engine, the 14000lbs Whale was safely out on the street, leaving behind her two deep muddy tracks in the lawn!

We had a great time in Stoneham, despite the rainy weather. Last year the Blue Whale was on a rather concealed campsite, this year it was in plain view of the entire campground, and it certainly drew some attention.

A few pictures:


Back to the shop! Here are the latest jobs done on the Travco:

Dashboard and interior

The new dashboard is now completed. The large rotten plywood piece shown in my last post has been replaced by a new one, covered with a gray vinyl, and with new air vents. A wood trim has been installed in the front of the dashboard, and on the driver side Dad re-installed the plastic trims over the instrument cluster and heater controls. Many of these controls were missing buttons, so Dad got some replacements. Also, many of these heater controls were not in their right location on the control panel. Someone probably took the thing apart at one time and couldn't figure out how to reassemble it properly. For exemple, pulling on the "Driver Heat" control actionned the defrost air flow... Dad reinstalled everything in their right spot, and everything works just fine now.

The previous owners installed some aftermarket engine gauges, because some of the original gauges are not working. A fuel quantity indicator, engine temperature, oil pressure and Amp meter gauges were all attached on the bottom of the dashboard, with a bunch of loose wires hanging everywhere behind them. Dad made this little console to hold these gauges, and it now looks much better.


The inside finish around the windshields and the front side windows was not very good looking. A mix of peeling old paint, old dried sealant and cracked fiberglass. Mom took the job of cleaning and repainting the frame around the windows. Here's a picture taken after the first paint coat, with the masking tape still on.


The new paint makes a real difference, and with the new dashboard, the inside front of the Whale now looks brand new.


Sun shade
Most motorhomes, incuding this Travco, have a curtain that can be slided in front of the front windshields, to provide some shade and privacy. As you may guess, the Whale's curtain wasn't exactly new and good looking. And Dad didn't really like the way the curtain is designed. The curtain is attached to the top of the windshield, leaving a big gap at the bottom, due to the winshield angle. Under direct sunshine, the empty space in front of the curtain acted as a greenhouse and was a significant heat source in the motorhome. So the curtain has been replaced with an outside, removable sunshade. Made out of a gray tarp by Dad and Mom, it is similar to the one thay made a few years ago for their previous class C motorhome.


The sunshade can be installed and removed in seconds, offers complete privacy, blocks the sun and keeps the inside cool. Mom even made a pouch to stow it. Dad installed, outside and just behind the side windows, two small stainless hooks on wich the shade is held with bungee cords.


Air vents
On each side of the Travco, abeam the front seats, are two small air vents, that can be opened with a small handcrank. The vent on the driver side was in good shape, but on the passenger side the mechanism was broken and the door was held shut with a piece of string. Dad took the handcrank and mechanism from an old RV roof vent and used it to fix the broken vent. Now this wasn't as easy as it sounds, it actually took a lot of time to fix this simple thing. The hinge was also broken and had to be replaced, Dad used a lenght of aluminium awning track to rebuilt the hinge. A lot of work for a simple air vent, but since the vehicle doesn't have air conditionning, fresh outside air will certainly be welcome while travelling.


External storage compartment
Outside the motorhome, Dad repaired the left front storage compartment. Like the rear one, it was pretty badly rusted, and had been "repaired" a few times by the previous owners with a mix of sheet metal glued with roof scealant... Dad reinforced the frame of the compartment, then used a thick weatherproof plywood for the bottom. The door was crooked and not closing properly, and it looks like its always been like that, the door was misaligned from the factory. Dad fixed it all, and the storage compartment is now nice and clean.

Carpet stowage
Another unique feature of the Blue Whale. Dad was looking for a way to stow the awning carpet. Simply rolling the carpet and tying it to the rear bumper, just like everybody else, wasn't good enough. So Dad installed this stowage tube under the rear of the vehicle. Roll up the carpet and slide it in, close the lid, that's it! Of course everything is made of junked stuff, works perfectly, and it cost nothing! The carpet can be stowed even when wet, as it is made of a material that will not rot.


12V electricity

The Travco's fuse box was in a pretty bad shape. Made out of molded fiberglass ans screwed under the dashboard, a screwdriver was required to open it. Imagine doing that every time you need to replace or check a fuse, in that little cramped and dark corner of the vehicle. Also, many fuses were missing (but everything in the motohome seems to be working), there are wires hanging everywhere that we can see were not part of the original wiring, some have inline fuses, some are connected in the fuse box, some are not connected anywhere, and in some cases standard lamp (110V) cord is used. Some have soldered splices, some have black electric tape, some have nothing... a real mess. Nothing very reassuring, especially since Dad had to replace a fuse lately (altough everything has been working fine since). One thing Dad doesn't need is getting stranded somewhere due to an electrcial problem he can't solve. We still had in mind the issues we found with the 110V wiring last year, it was time for a good checkup of all this. With a good multitester, a test light, and a Dodge truck wiring schematic, we went to work.

The huge 250 Amp/h 8D battery of the Travco feeds the starter and starter relay, and many important circuits of the motorhome. One large wire goes from the battery to the 12V converter, wich allows the converter to recharge the battery when the motorhome is plugged in a 110V outlet (or 110V from the genset).
Another main wire goes in the kitchen were another fuse box distributes power to various motohome appliances: heater, water pump, lights, etc.
Then another main wire goes straight to the front of the motorhome, under the dashboard, and is connected to... nothing! Yep, that's right, a big gauge 4 or 6 wire, continuously live, runs from the battery and just hangs there, under the dashboard, with a bare end and no protection at all. And we still don't have a clue what this wire does, and since it was obviously dangerous, we properly secured and stowed it.

After some investigation, we found that most of the non-original wires under the dashboard were from stuff added by the previous owners, like the engine gauges previously mentionned, a cruise control (wich is not working, probably due to a wiring issue...), a stereo and its 6 speakers (I guess they liked it LOUD), etc. Most of the added wires are connected here or there, using black tape, a real botched job.


Once all these wired identified and all conections secured, we tested the electrical system to its maximum capacity. We wanted to check if, after a certain time, some circuits were overheating or fuses blowing. With the battery charger hooked to the battery to prevent discharge, we turned everything ON in the vehicle: all exterior lights on, headlights, heater blower, radio, turn signals, EVERYTHING was ON. After about 15 minutes of continuous operation, we made a couple interesting discoveries...

One of the wires in the fuse box was getting dangerously hot. Another wire, not original to the vehicle and with an inline fuse, was burning hot and the plastic fuse holder was almost melting. When we took that fuse out, all the parking lights outside, and the dashboard lights went off. Why were the parking lights powered through this fuse (and such a tiny wire), when there already was a fuse for the parking lights in the fuse box? When removing the one in the fuse box, the lights were going out as well. So why a 2nd fuse on that circuit?

The wiring schematic we had was a "generic" schematic for Dodge trucks of that vintage, and did not exactly match the Travco's. We had to figure the Travco's wiring, then figure out what modifications were made by the previous owners, and why. We spent quite some time figuring it all.

We finally found that one of the contacts on the headlight switch, the contact that switches the parking lights, is not working anymore. The previous owners tinkered with the wiring to make the parking lights work. I don't really understand why they did it that way, but they had the whole circuit going through a very thin wire that was overheating, and this "fix" could have eventually caused a fire.

We found a better workaround for the defective headlight switch, and rewired everything properly. Everything should now be safe and reliable Nothing overheats, the remainder of the wiring is in proper condition, and all the loose splices have been fixed. Dad reinstalled the fuse box with a hinged cover held by a small latch that can be opened without a screwdriver.
There are still a few non-original wires that we haven't been able to figure out, but right now everything works fine and nothing is unsafe. The electrical system of the Whale should be reasonably reliable, as reliable as a 33 year-old vehicle can be.

Second trip
Over the last couple days, Dad and Mom got the Blue Whale ready for a little trip in the Montréal area. As usual, Dad always has a myriad of last minute things to do on the motorhome, and they never leave as quickly as Mom would like to!
One exemple of a small last minute add-on, is the installation of auxiliary driving lights. Mounted on the front bumper, they will certainly increase vision when driving at night or in bad weather.


The Whale should be back in Quebec City early next week.